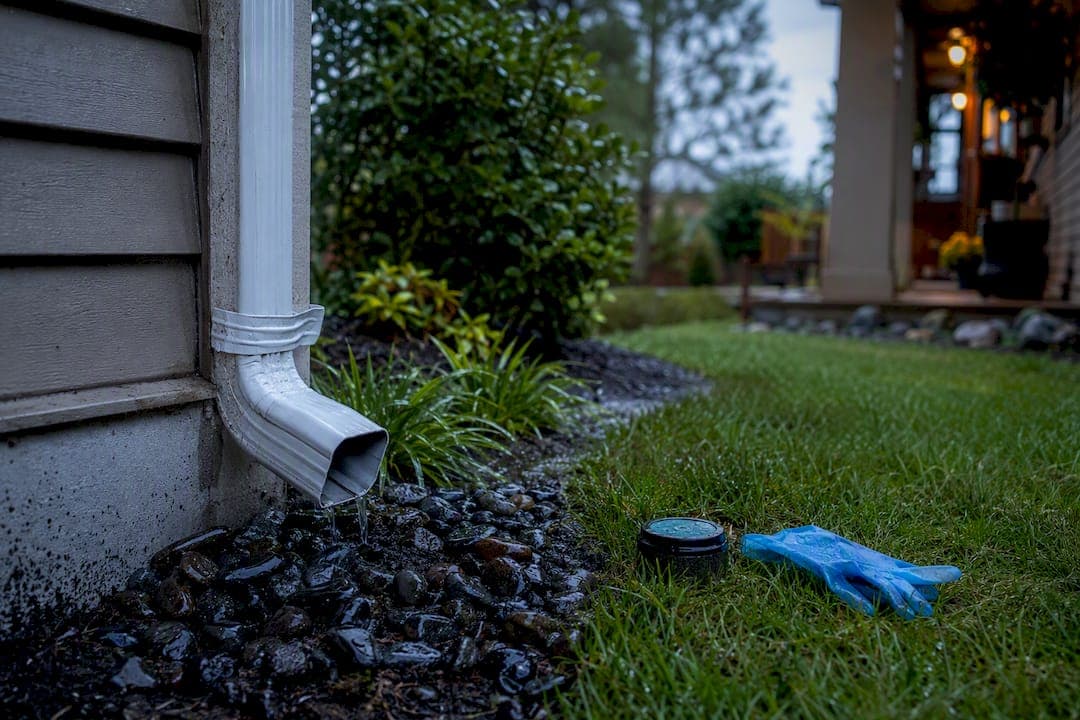
If the water is pooling right at the base of your downspout while your gutters run fine, a controlled hose flush from the top is worth trying. If you're seeing basement dampness, repeated backups, or you can't find where the pipe discharges, stop flushing and get a professional camera inspection before you make things worse. The priority is always keeping water away from your foundation.
TL;DR:
- Clogs are often caused by sediment buildup, debris-trapping corrugated pipe, crushed or misaligned sections, or buried outlets, requiring specific fixes.
- Signs of blockage include water backing up at the downspout, silence at the discharge point during rain, and persistent soggy or sunken soil along the line.
- DIY methods like flushing and snaking work best on minor debris near the inlet, but professional hydro-jetting and camera inspections are needed for deeper or recurring problems.
- Proper long-term prevention includes installing gutter guards, choosing smooth PVC pipe, maintaining slope, and regularly inspecting the discharge points.
- Call a professional if you notice basement dampness, repeated backups, or when the pipe path is unknown, and always verify that they perform camera inspections before any excavation.
Table of Contents
- What is an underground downspout drain and why does it matter?
- What are the signs of a clogged underground downspout?
- What causes underground downspout drains to clog?
- How do you diagnose a clogged downspout from the surface?
- How do you clear a clogged underground downspout yourself?
- What can a professional do that DIY methods can't?
- How do you prevent underground downspout clogs long term?
- When should you call a professional for a clogged downspout?
- What we've learned clearing downspouts across the Comox Valley
- Keep your gutters and drains clear before the wet season hits
- Sources
What is an underground downspout drain and why does it matter?
An underground downspout drain carries roof runoff away from your foundation through buried pipe instead of dumping it at your feet. Most homes on Vancouver Island have some version of this system, and most homeowners never think about it until it stops working.
The pipe itself is usually one of two materials: corrugated plastic (ribbed, flexible, cheap to install) or solid PVC (smooth walled, rigid, better at moving water). Some sections are perforated to let water seep into surrounding soil; others are solid, meant to carry water to a specific discharge point without leaking along the way.
That discharge point matters more than most people realize. Buried downspout lines typically end in one of three ways:
- Daylight outlet: the pipe simply exits at a lower point in the yard, often at a slope or ditch.
- Pop-up emitter: a spring-loaded cap that lifts underwater pressure and drops flat when idle, keeping the outlet flush with the lawn.
- Storm sewer tie-in: the line connects to a municipal storm system, which is heavily regulated in most jurisdictions and never appropriate for tying into a footing drain.
That last point is worth pausing on. Connecting a downspout into a footing or interior foundation drain seems efficient on paper, but it can overload that system during heavy rain, sending leaves and grit straight into a drain that was never designed to filter debris. That's how a clogged gutter turns into a flooded basement overnight.
Grade matters just as much as pipe material. Drainage experts recommend roughly 5% slope away from the foundation across the first ten feet, with the discharge point sitting several feet clear of the house. Get that wrong, and even a perfectly clear pipe will send water right back toward your basement wall.
What are the signs of a clogged underground downspout?
A clogged underground downspout announces itself in a handful of predictable ways, and catching them early saves you a soggy crawlspace later. Watch for these during the next real rainstorm, not a light drizzle. It takes sustained flow to expose a partial blockage.
- Water backs up right at the downspout. If you see overflow pooling at the base of the downspout while the gutters upstream are still flowing normally, the blockage is likely near the inlet or in the first few feet of buried pipe.
- Nothing comes out at the outlet. Walk to wherever the pipe is supposed to discharge, whether that's a daylight opening or a pop-up emitter, and check during active rain. Silence there, paired with water somewhere else, tells you the blockage sits between those two points.
- You hear gurgling or chugging sounds. Water fighting its way past a partial clog often makes noise, especially right after a downspout elbow where flow direction changes.
- A pop-up emitter won't lift. If the spring-loaded cap stays flat during a downpour instead of popping open, either the line feeding it is blocked or the emitter itself is jammed with sediment.
- You notice a persistent soggy line or sunken soil. A strip of consistently wet or slightly depressed ground tracing from your downspout toward the yard often marks a leaking or collapsed section underground, even between storms.
Any one of these on its own is worth investigating. Two or more together, especially backup at the downspout combined with silence at the outlet, means you've likely got a blockage somewhere in the middle of the run.
What causes underground downspout drains to clog?
Most clogs trace back to one of four root problems, and understanding which one you're dealing with changes how you fix it. A quick flush might solve problem one and do nothing for problem three.
- Sediment and roof grit buildup. Asphalt shingles shed granules for their entire service life, and that grit travels straight down the downspout into the buried line. Long runs with minimal slope act like settling tanks, letting sediment accumulate into banks that narrow the pipe over years.
- Corrugated pipe with debris-trapping ridges. The same ribbing that gives corrugated pipe its flexibility also creates dozens of little ledges where debris catches and roots can work their way in through joints and perforations. Corrugated flex pipe is one of the most common causes of recurring clogs precisely because smooth-walled pipe doesn't give debris anywhere to grab.
- Crushed, sagging, or misaligned sections. Ground settling, freeze-thaw cycles, or a heavy vehicle driven over a shallow line can crush pipe or create a low belly where water and sediment pool instead of flowing through.
- Buried or stuck outlets. Landscaping projects bury pop-up emitters under mulch or sod, and daylight outlets get overgrown or clogged with leaf litter, so even a perfectly clear pipe has nowhere to send its water.
Pro Tip: If your home was built before the mid-2000s and still has its original downspout drains, there's a decent chance you're dealing with corrugated pipe. That single detail predicts a lot about why your clogs keep coming back.
Roofs shedding granules is a slow, invisible process, but it's steady. A roof cleaning and moss removal visit that clears accumulated debris and grit off the shingles reduces how much material ends up washing into your downspouts in the first place.
How do you diagnose a clogged downspout from the surface?
You don't need to dig up your yard to get a good sense of where a blockage sits. A methodical surface check during real rainfall (or a hose test that mimics it) narrows the problem down before you call anyone or reach for a snake.
- Wait for steady rain, or run a hose test. A light drizzle won't generate enough volume to expose a partial clog. You want sustained flow, either from genuine rain or by running a garden hose into the gutter for several minutes.
- Remove the downspout elbow and inspect the inlet. Most elbows pop off or unscrew easily. Pull it and look for a mat of leaves, shingle grit, or a nest sitting right at the transition into the underground pipe. This is genuinely the most common clog location, and it's the easiest to fix.
- Trace the buried line above ground. Walk the presumed path of the pipe looking for wet stripes, unusually lush grass, or soil that feels soft or slightly sunken compared to the surrounding lawn. These often mark a leaking joint or a collapsed section below.
- Probe gently along suspicious sections. A thin rod or screwdriver pushed carefully into soft ground can help confirm pipe depth without real digging, but stop if you hit resistance you can't identify.
- Locate and uncover the outlet. Find where the line is supposed to discharge. If it's a pop-up emitter, clear away mulch or sod covering it and check whether it lifts under flow. If it's a daylight outlet, make sure it isn't buried, crushed, or blocked by debris.
Pro Tip: Take five minutes to photograph the elbow, the suspected wet-line path, and the outlet before you touch anything. If you end up calling a professional, those photos save them time and often save you money on the diagnostic portion of the visit.
If the inlet is clean, the outlet flows fine under a hose test, but you still get backup during real storms, the problem might not be a clog at all. A saturated discharge area or a yard with insufficient fall can back up a perfectly functional drain just as effectively as a blockage can.
How do you clear a clogged underground downspout yourself?
Start with the least invasive method and work up only if it fails. Most homeowners jump straight to a snake when the real problem was a handful of leaves sitting at the inlet.
- Clean the gutters and inlet screens first. Before you touch the underground portion, clear the gutters themselves and any inlet screen at the top of the downspout. A gutter cleaning service handles this step for homeowners who'd rather not climb a ladder, and it eliminates the single most common source of debris feeding into the buried line.
- Try a controlled hose flush. Feed a garden hose into the downspout from the top, ideally with the elbow removed so you can watch water enter the underground section. Run it at a moderate, steady volume rather than a sudden blast. If you can access the outlet end too, flushing from both directions at once often dislodges debris that a single-direction flush pushes deeper instead of out.
- Move to a plumber's snake or drain auger if flushing fails. A standard sewer auger, sized to the pipe diameter (usually around 3 or 4 inches for downspout lines), can be fed from the inlet toward the outlet. Feed it slowly and let the rotating tip do the work rather than forcing it, which risks punching through an already weakened joint.
- Use a wet/dry vacuum to pull debris back out. After breaking up a clog with an auger or flush, a shop vac at the inlet end can pull loosened sediment and debris back toward you instead of leaving it to resettle further down the line. This works best on shorter runs where the vacuum's suction can actually reach.
- Know when your hose and vacuum have hit their limit. A household garden hose can clear a minor clog near the inlet, but it simply doesn't move enough volume to flush a long run packed with years of shingle grit. Professionals reach for hydro-jet attachments specifically because they deliver far more volume and scouring force than anything sold at a hardware store, and consumer tools often leave sediment residue behind even when the immediate blockage clears.
Pro Tip: Never run a consumer pressure washer wand down into buried downspout pipe. The concentrated pressure that works great on a driveway can split aging corrugated pipe or blow apart a joint, turning a clog into a leak you now have to excavate to fix.
That last point deserves emphasis because it's a mistake that turns a $50 problem into a $500 one. Pressure washers are built for flat, hard surfaces where the spray dissipates across open air. Inside a confined pipe, that same pressure has nowhere to go except against the pipe wall itself, and older corrugated sections in particular don't hold up well against that kind of concentrated force. If a flush and a snake haven't solved it, that's your signal to stop and call in hydro-jetting equipment built for this specific job rather than escalating with the wrong tool.
What can a professional do that DIY methods can't?
Professional drain contractors bring three capabilities most homeowners simply don't have access to: a camera, real hydraulic force, and the judgment to know when clearing the pipe isn't actually the fix.
- Camera inspection first. A sewer camera fed through the line shows exactly what's happening: sediment banks, root intrusion, a crushed section, or a joint that's separated. This single step tells a contractor whether cleaning, sectional repair, or full replacement is the right call, and it stops you from paying for a clean-out on a pipe that actually needs replacing.
- Hydro-jetting for genuine sediment removal. Where a garden hose trickles, a jetting rig blasts. The combination of pressure and volume scours sediment off pipe walls rather than just pushing a plug from one spot to another, which is why professional jetting tends to produce results that actually last.
- Sectional repair when replacement isn't necessary. If the camera shows a single damaged segment or a localized root intrusion, a targeted repair to just that section is often more cost effective than digging up the whole run.
- Rerouting when the old path is the real problem. Sometimes the line was never installed with proper slope, or it discharges into ground that's saturated half the year. A professional can reroute the pipe to a better discharge point instead of repeatedly clearing a line that was doomed from the start.
When you're getting quotes, ask what pipe diameter and jetting attachment the contractor plans to use. Access and pipe length are the two biggest cost drivers, and a contractor who's already asked about your yard's layout is one who's thought past the clog itself.
How do you prevent underground downspout clogs long term?
Clearing a clog without fixing why it happened is a temporary win at best. If the sediment source and outlet conditions stay the same, you'll be back here again next winter.
- Install gutter guards and downspout inlet screens. Blocking debris before it enters the system beats removing it after the fact every time. Gutter guard installation using a double-layered aluminum system stops needles, leaves, and grit from ever reaching the downspout inlet.
- Choose smooth solid PVC over corrugated pipe for any new or replaced run. The smooth interior wall doesn't trap debris the way ribbed corrugated pipe does, and it's far more resistant to root intrusion since there are no perforations or ridged joints for roots to exploit.
- Confirm and maintain proper slope away from the foundation. That roughly 5% grade across the first ten feet isn't a suggestion; it's what keeps water moving toward the outlet instead of pooling against your basement wall.
- Keep discharge points visible and clear. Whether it's a pop-up emitter or a daylight outlet, don't let landscaping, mulch, or new sod bury it. A downspout extension or splash block at the discharge point keeps water moving away from the house instead of eroding a hole right at the outlet.
- Flush and inspect annually or every other year. Catching a partial sediment buildup before it becomes a full blockage is far cheaper than excavating a collapsed section later.
- Mark buried lines and avoid driving or parking heavy equipment over them. Shallow-buried pipe crushes easily under sustained weight, and a crushed section almost always requires excavation to fix.
| Maintenance action | Why it matters | Suggested frequency |
|---|---|---|
| Gutter and inlet screen cleaning | Removes debris before it enters the buried line | Twice yearly (spring and fall) |
| Downspout flush and outlet check | Catches sediment buildup before full blockage | Annually or every two years |
| Slope and outlet visibility check | Confirms water still drains away from foundation | Annually, especially after landscaping work |
| Gutter guard inspection | Confirms guards are still diverting debris effectively | Annually |
When should you call a professional for a clogged downspout?
Some situations are genuinely fine to handle yourself. Others carry enough risk to your foundation that a DIY attempt just delays the inevitable, more expensive call.
- You've seen basement water or persistent dampness. This is not a wait-and-see situation. Water finding its way into a basement means the drainage failure has already outpaced whatever the pipe was designed to handle.
- You've tried flushing and snaking without lasting success. If the clog keeps returning within weeks of clearing it, something structural is likely wrong with the pipe itself, not just the debris inside it.
- You suspect root intrusion. Roots don't respond to a flush or an auger the way loose debris does, and pulling them out without damaging the pipe usually takes the right tool and experience.
- You have old, unknown corrugated pipe and no idea where it runs. Guessing at the path of a decades-old buried line before digging is a recipe for cutting into something you didn't mean to.
- The outlet is buried, inaccessible, or you simply can't find it. If step one of diagnosis is already a dead end, professional locating equipment will save you hours of guesswork.
When you do call someone, ask for a camera inspection before any digging starts, and ask them to explain whether they're recommending jetting, sectional repair, or full replacement, and why. A contractor worth hiring should also address grading issues around the discharge point, not just clear the pipe and leave the same conditions in place to cause the next clog. Confirm upfront whether yard restoration is included if excavation turns out to be necessary, and ask about warranty coverage on any repaired or replaced sections.
What we've learned clearing downspouts across the Comox Valley
Working across Comox, Courtenay, and the wider Comox Valley, our crews see the same pattern on property after property: decades-old corrugated pipe, packed with shingle grit, discharging into a pop-up emitter that's been buried under three seasons of mulch. It's rarely one dramatic failure. It's slow accumulation that finally tips over during the first serious fall rain.
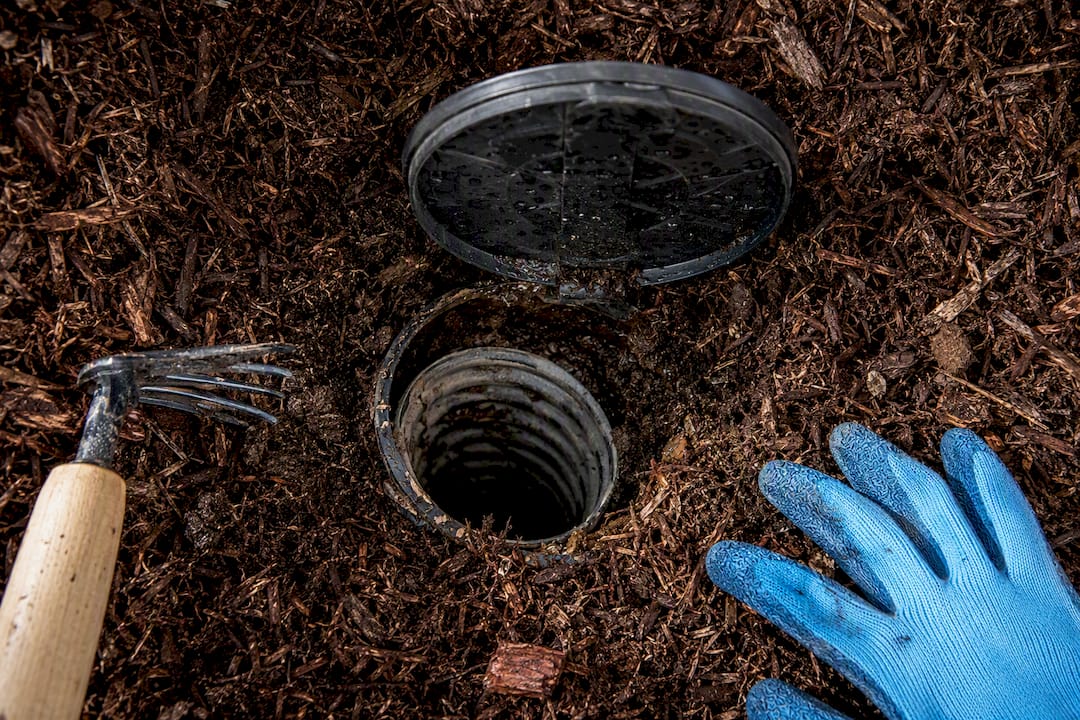
The fixes that actually hold up long term are consistent too. Swapping corrugated sections for smooth PVC, keeping emitters visible and clear of landscaping, and pairing gutter guards with a downspout drain that isn't already compromised solves the problem at the source instead of just buying a few dry months.
One property we worked on in the Comox Valley had backed up every winter for three years running, with the homeowner assuming it was a gutter problem. A camera inspection found a crushed corrugated section about eight feet from the house, likely from a landscaping project years earlier. Replacing that run with solid PVC and rerouting the outlet to daylight, away from the saturated corner it had been discharging into, ended the annual flooding for good.
The lesson holds regardless of which street you're on: a clog you clear without fixing its cause is a clog you'll be dealing with again.
— Island
Keep your gutters and drains clear before the wet season hits
Professional exterior cleaning crews handle the full picture, from clearing gutters and inlet screens to diagnosing what's happening underground, without the trial-and-error homeowners often go through first.

If you're dealing with backup at the downspout, standing water near your foundation, or you just want the gutters cleared before the fall rains set in, our gutter cleaning service is the natural starting point across Comox, Courtenay, and the surrounding Comox Valley. For homes where debris keeps rebuilding season after season, gutter guard installation using the Alu-Rex double-layered aluminum system stops the problem before it starts. And if shingle grit from an aging roof is feeding the clog, our roof cleaning and moss removal service addresses that at the source, backed by our multi-year moss return guarantee.
Call 250 650 8123 or book online at Islandmossbusters to get your gutters and downspouts sorted before the next storm rolls in.
Sources
- JLC | Q&A: Connecting gutter downspouts to footing drains
- Done Gutter — How to clean buried downspout drains
- Fairfax County Soil and Water Conservation District — Gutters and downspouts: wetness or erosion problems
- Why Your Underground Downspout Drain is Clogged and What to Do About It